Author Archives: Docwatmo

About Docwatmo

Just an average guy reviewing equipment for the average guy (or gal).

More Power Arg, Arg, Arg!!

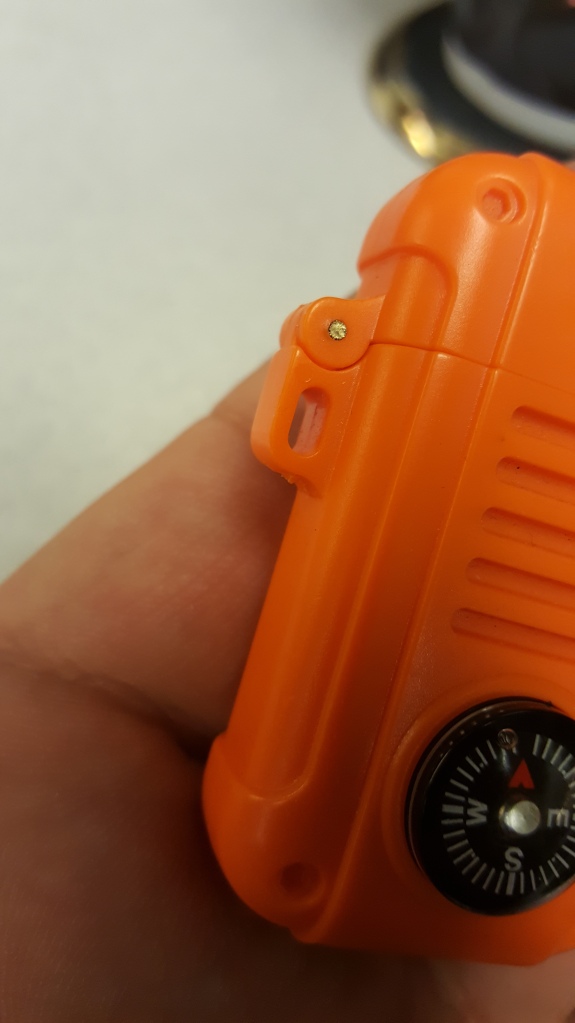
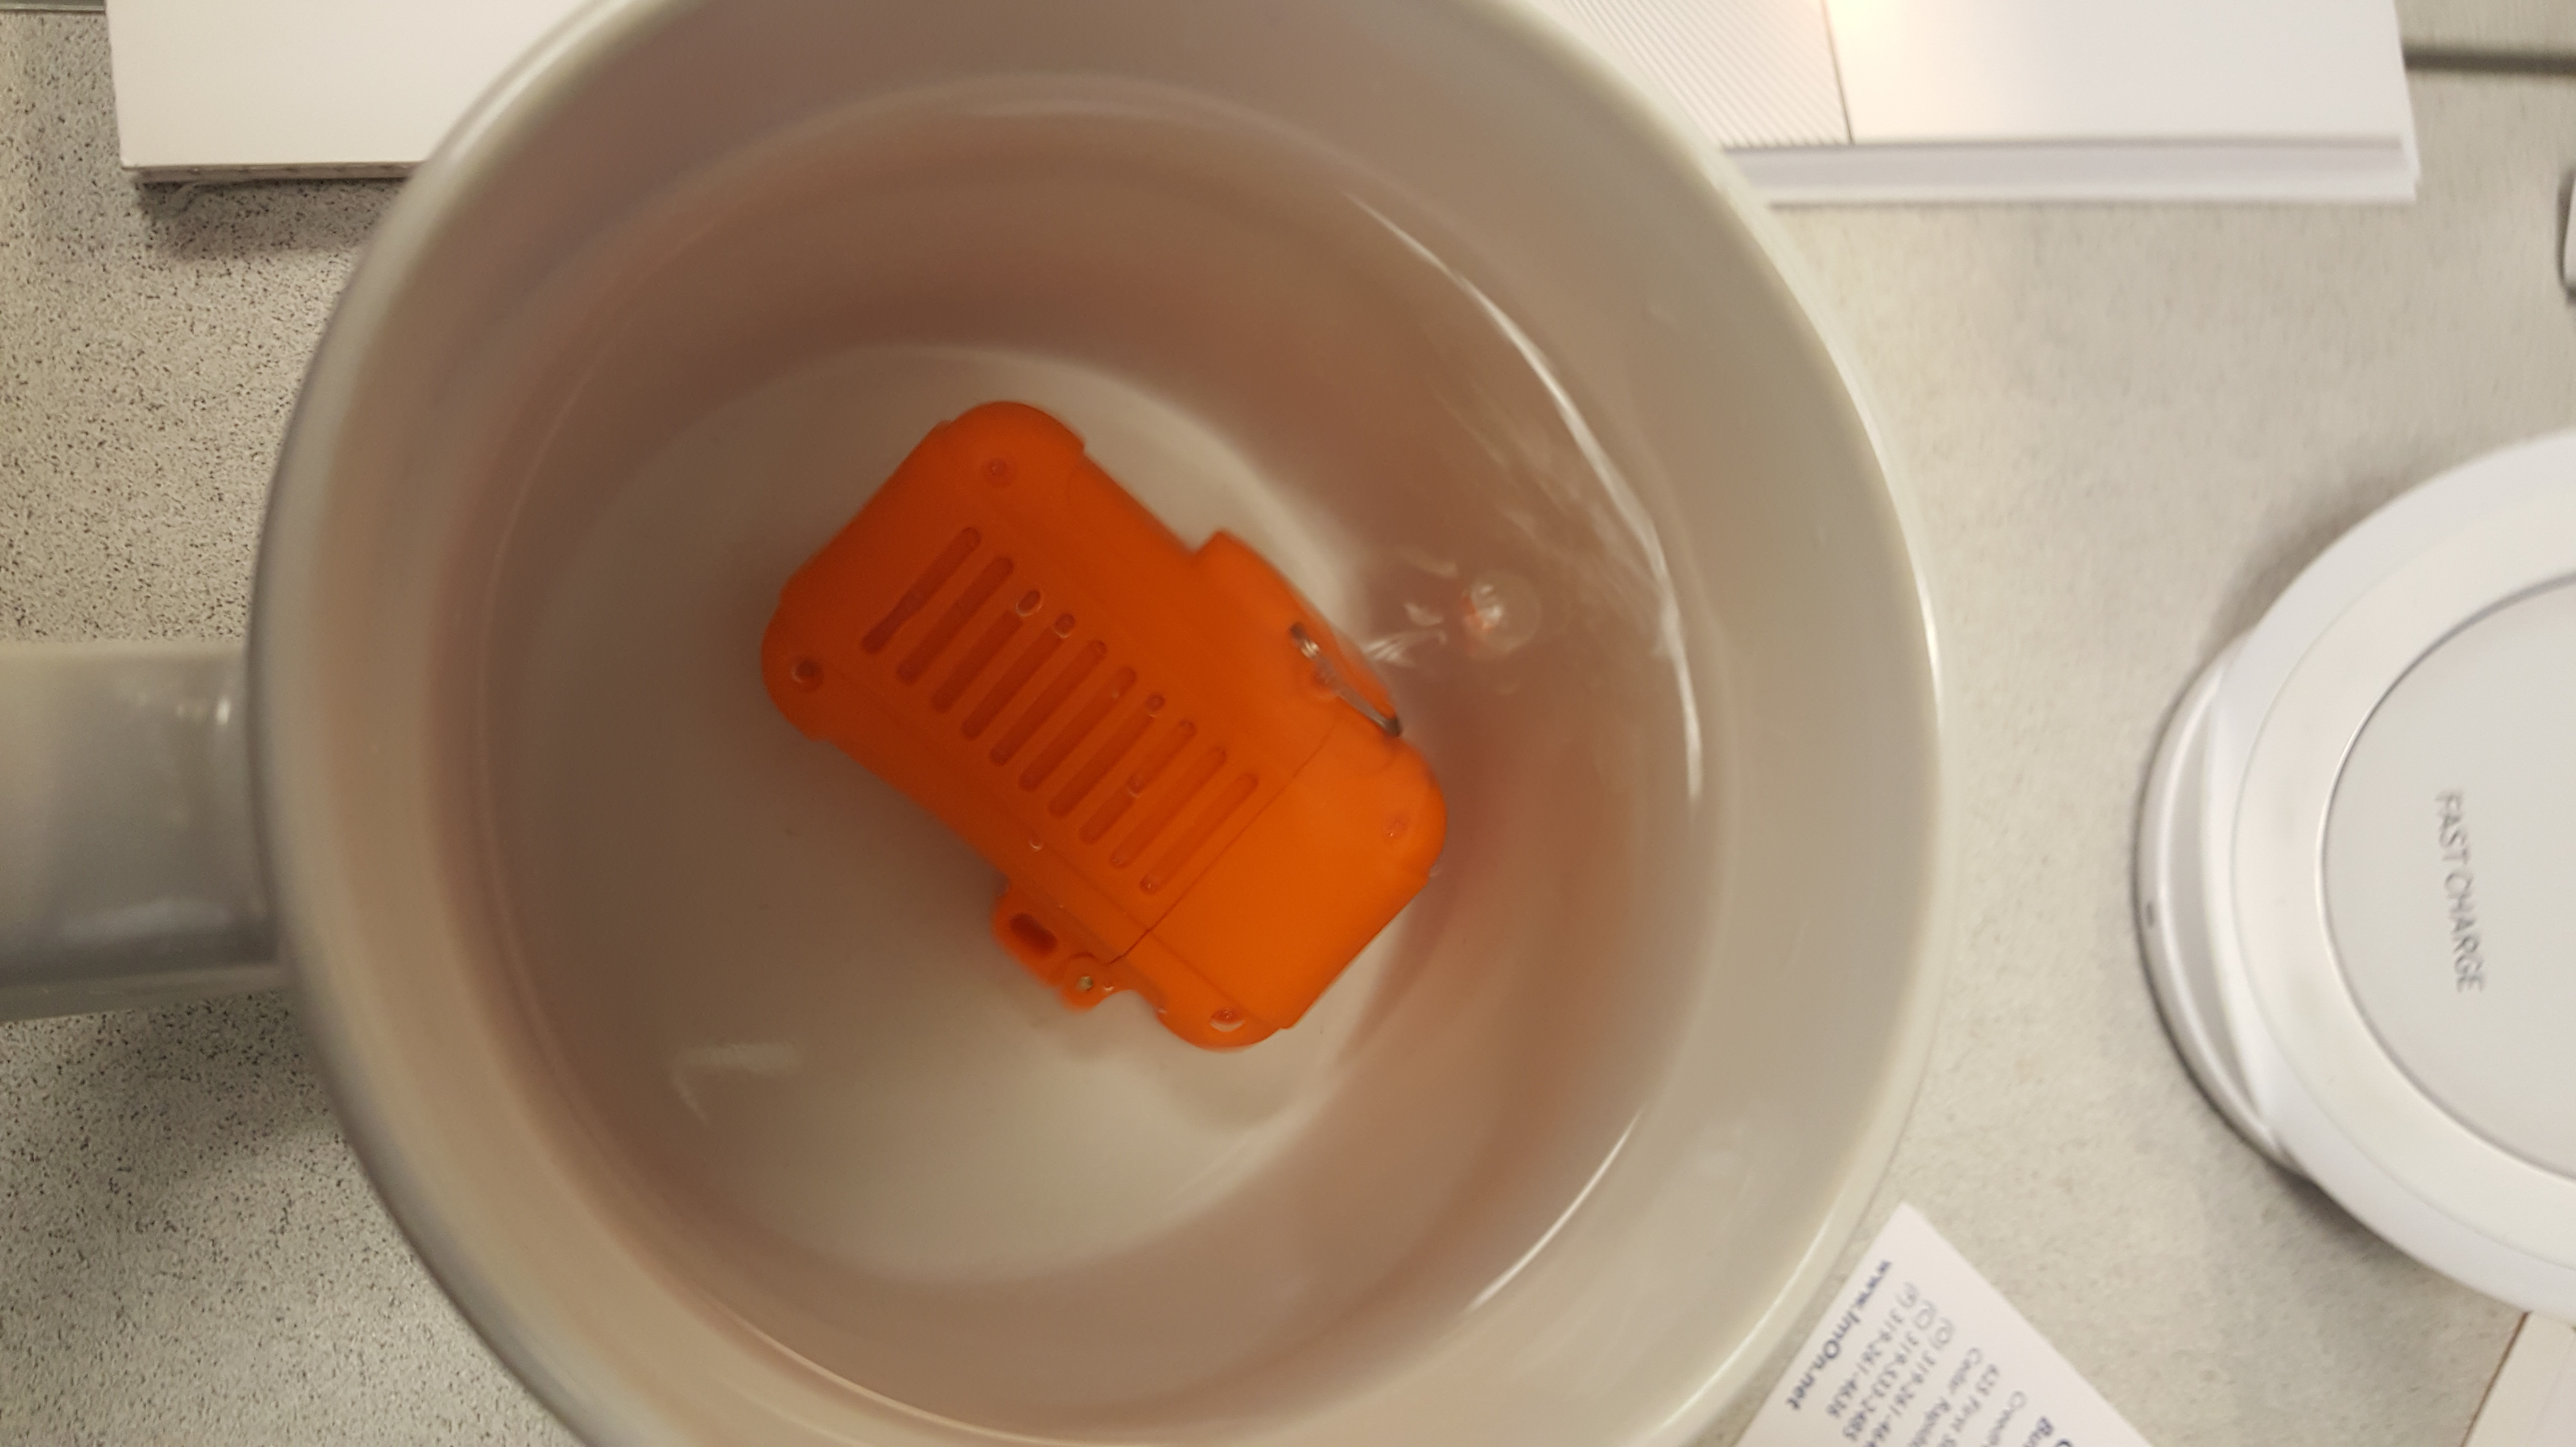
Unless your really trying to go Cro-Magnon, (in which case, leave your refined metal knives and hatchets and fabrics, tarps, fire rods, etc behind too and just use rocks and sticks), most of us take some kind power into the woods with us. Even if it’s just a flashlight, or the watch on our wrist. I usually take my phone, my camera and occasionally my ipad or surface book for editing and occasionally writing. (Particularly if I’m testing gear). Then I can put stuff down while it’s fresh in my mind. (I have to type, I write too slow LOL). I also have a GPS unit I enjoy playing with (It’s more of a toy than a navigation aid). I play with a lot of HAM radio gear, so I have to power that as well, or just juice up the batteries for the radios my scouts use so they can explore without having to have an adult breathing down their necks. I also have a drone I love to fly in the woods, excellent toy/tool. Not just for getting great pictures and video, but also for mapping, or finding things. (I am looking to add an IR camera drone to my list for help with SAR/CERT actions). Just fun stuff. 🙂

So the next time some self important snob turns his nose up at your camera, flashlight, phone, etc, just ignore him and enjoy yourself.

I run 2 specific “Kits” depending on how much weight I’m willing to carry with me. 1 kit is all light weight but plenty of power, the 2nd kit is normal weight and lots of power and then there is the “Car” option where I just take it all with me. LOL

Let look at the individual pieces and then we’ll discuss how I put them together and use them. The first piece of solar gear I got was a Goal Zero nomad 13, I’ve had this for many years and it’s still going strong. It’s light, tough and folds well, also has a handy pouch on the back that even my monster 100 watt pack will fit in. I love it, and it’s tough as nails, lasted through more abuse than it should ever have been given. Only issue is it’s only a 13 watt pannel, which is fine for most devices, but modern phones that use QC or fast charge technology don’t get the power as easily.

Goal Zero 13 watt folded
Pouch built on the back
Opened, yes it’s very well used

I have since added an Anker 21 watt dual charger. At full sun, it can charge 2 of my devices at fast charge speeds. I’m truly impressed with it. It’s not much bigger expanded than the goal zero, and folds even smaller. it is not built quite as rugged as the Goal zero, but It’s not weak either. This guy is so efficient, even on a cloudy day, he will produce 15 to 18 wats which will still charge a single device very well.

Anker 21 watt folded
unfolded, it has a small pouch, but not big enough for
anything other than the tail end of a phone.

Next is my 100 watt basecamp power pack. I LOVE this one because it has an inverter built in so I can charge a laptop, proprietary camera or device that uses it’s own plug. It has both USB and USB C connectors as well as a QC Wirelss charger built on the back. it truly is a wonderful pack and only about 1/2 lb heavier than the 20,000 mAh power packs I normally use. Thisk one typically stays with the camp, or in the car. However, I did take it on a 7 day canoe trip in place of one of my other battery packs and never noticed the difference.

Goal Zero 100 Watt with inverter

Next, I have two of these power packs, one is an Anker, and the other is a generic, neither cost more than $60. I keep a “Running” pack in the pelican case with the cables for charging things on the go, and the 2nd one is in a soft pack that stays with the solar chargers at camp charging during the day. I just swap them when one is full. I’ve run this configuration for 14 days without ever running down below 50% total power available. Which is one of the reasons I started working on the lightweight kit.

Generic 20,000 mAh pack in a pelican 1060 case with cables for all devices.
2nd pack with soft case and cables in bag.

Now on to my lighter kit. I picked up 2 of these xtar charger packs. (One is USB C, the other is Micro USB). They each hold 2 18650 batteries (Which I salvaged from some Dell Battery packs that were going to be recycled as the laptops they belonged to had been discontinued. These are charging packs, so you load 2 of the 18650 batteries up into each one, and then charge them off solar. (Or from a port on the basecamp model 100 watt I keep at camp). Then once the batteries are charged, it goes with you and works in reverse to charge other devices. I keep two 4 packs of these in my bag, but sometimes drop down to one 4 pack if I’m trying to go ultra light. I have not managed to discharge all 8 batteries yet on a trip. I have done 4, but charged them up the next day. So in a pinch, I could get away with 4 (or maybe 6, leave 2 in the pack and carry a 4 pack). But this works great.

Unit and two 4 packs of 18650 batteries.
Unit open.

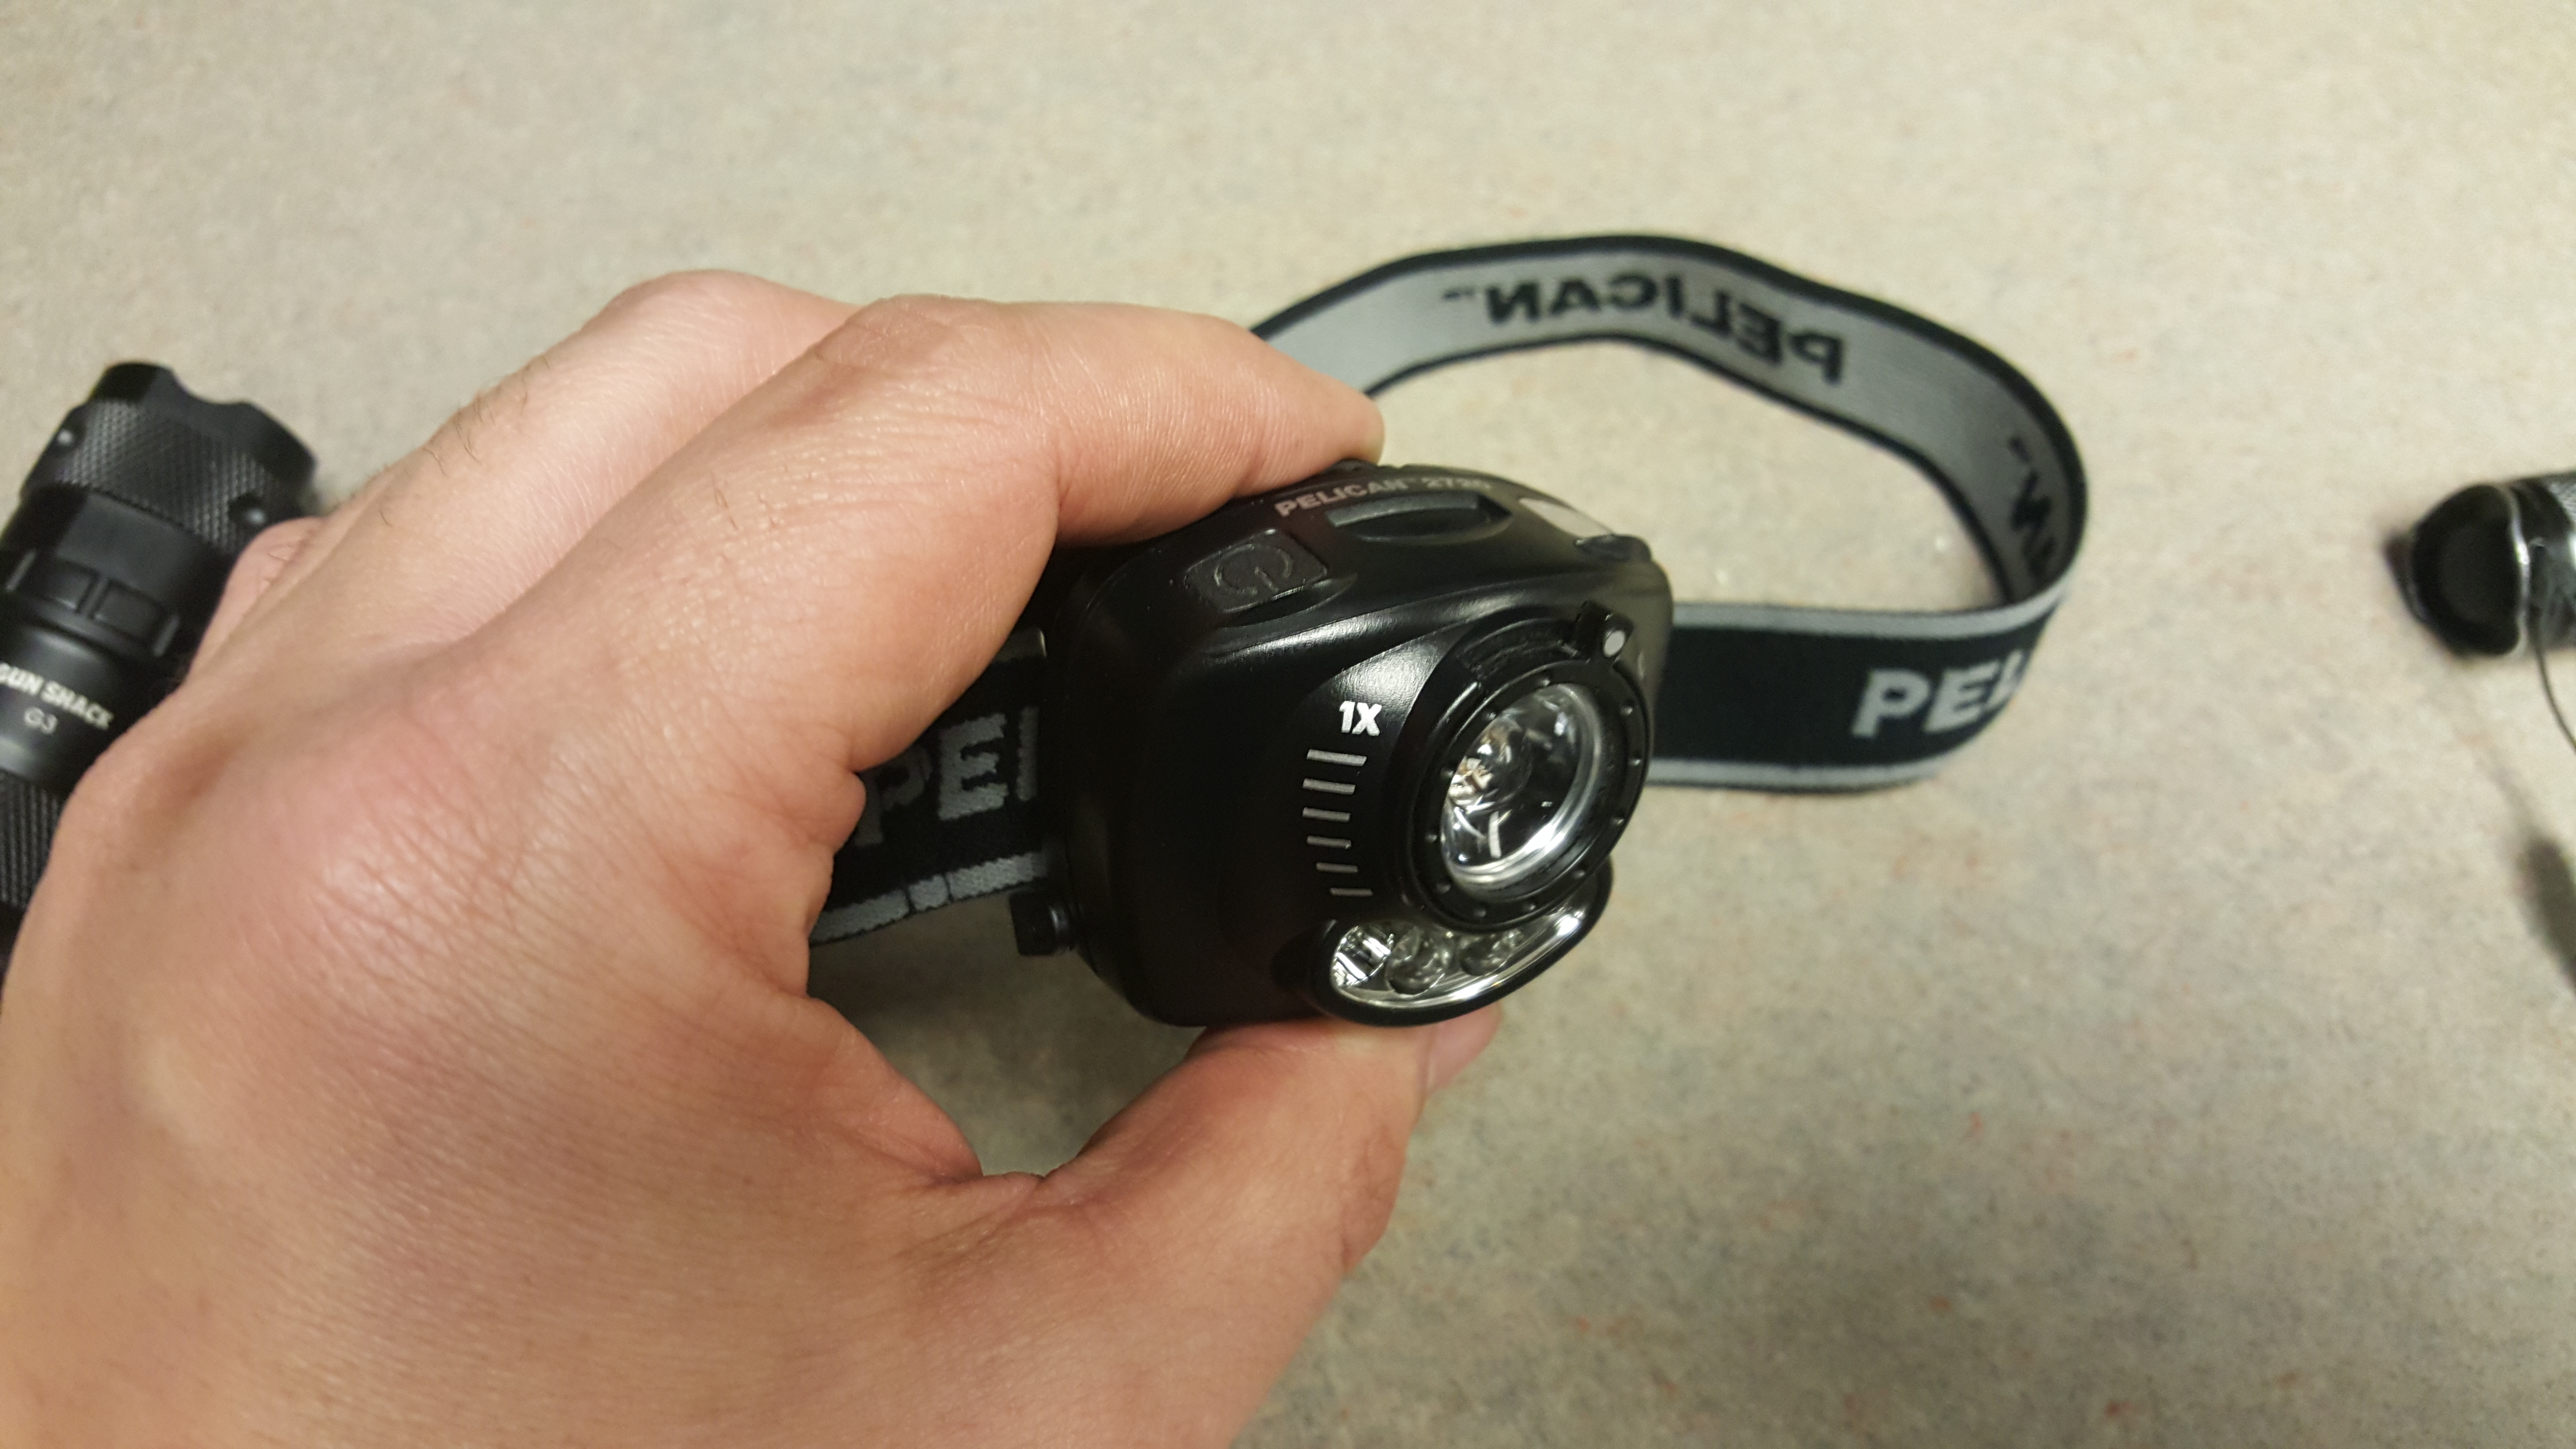
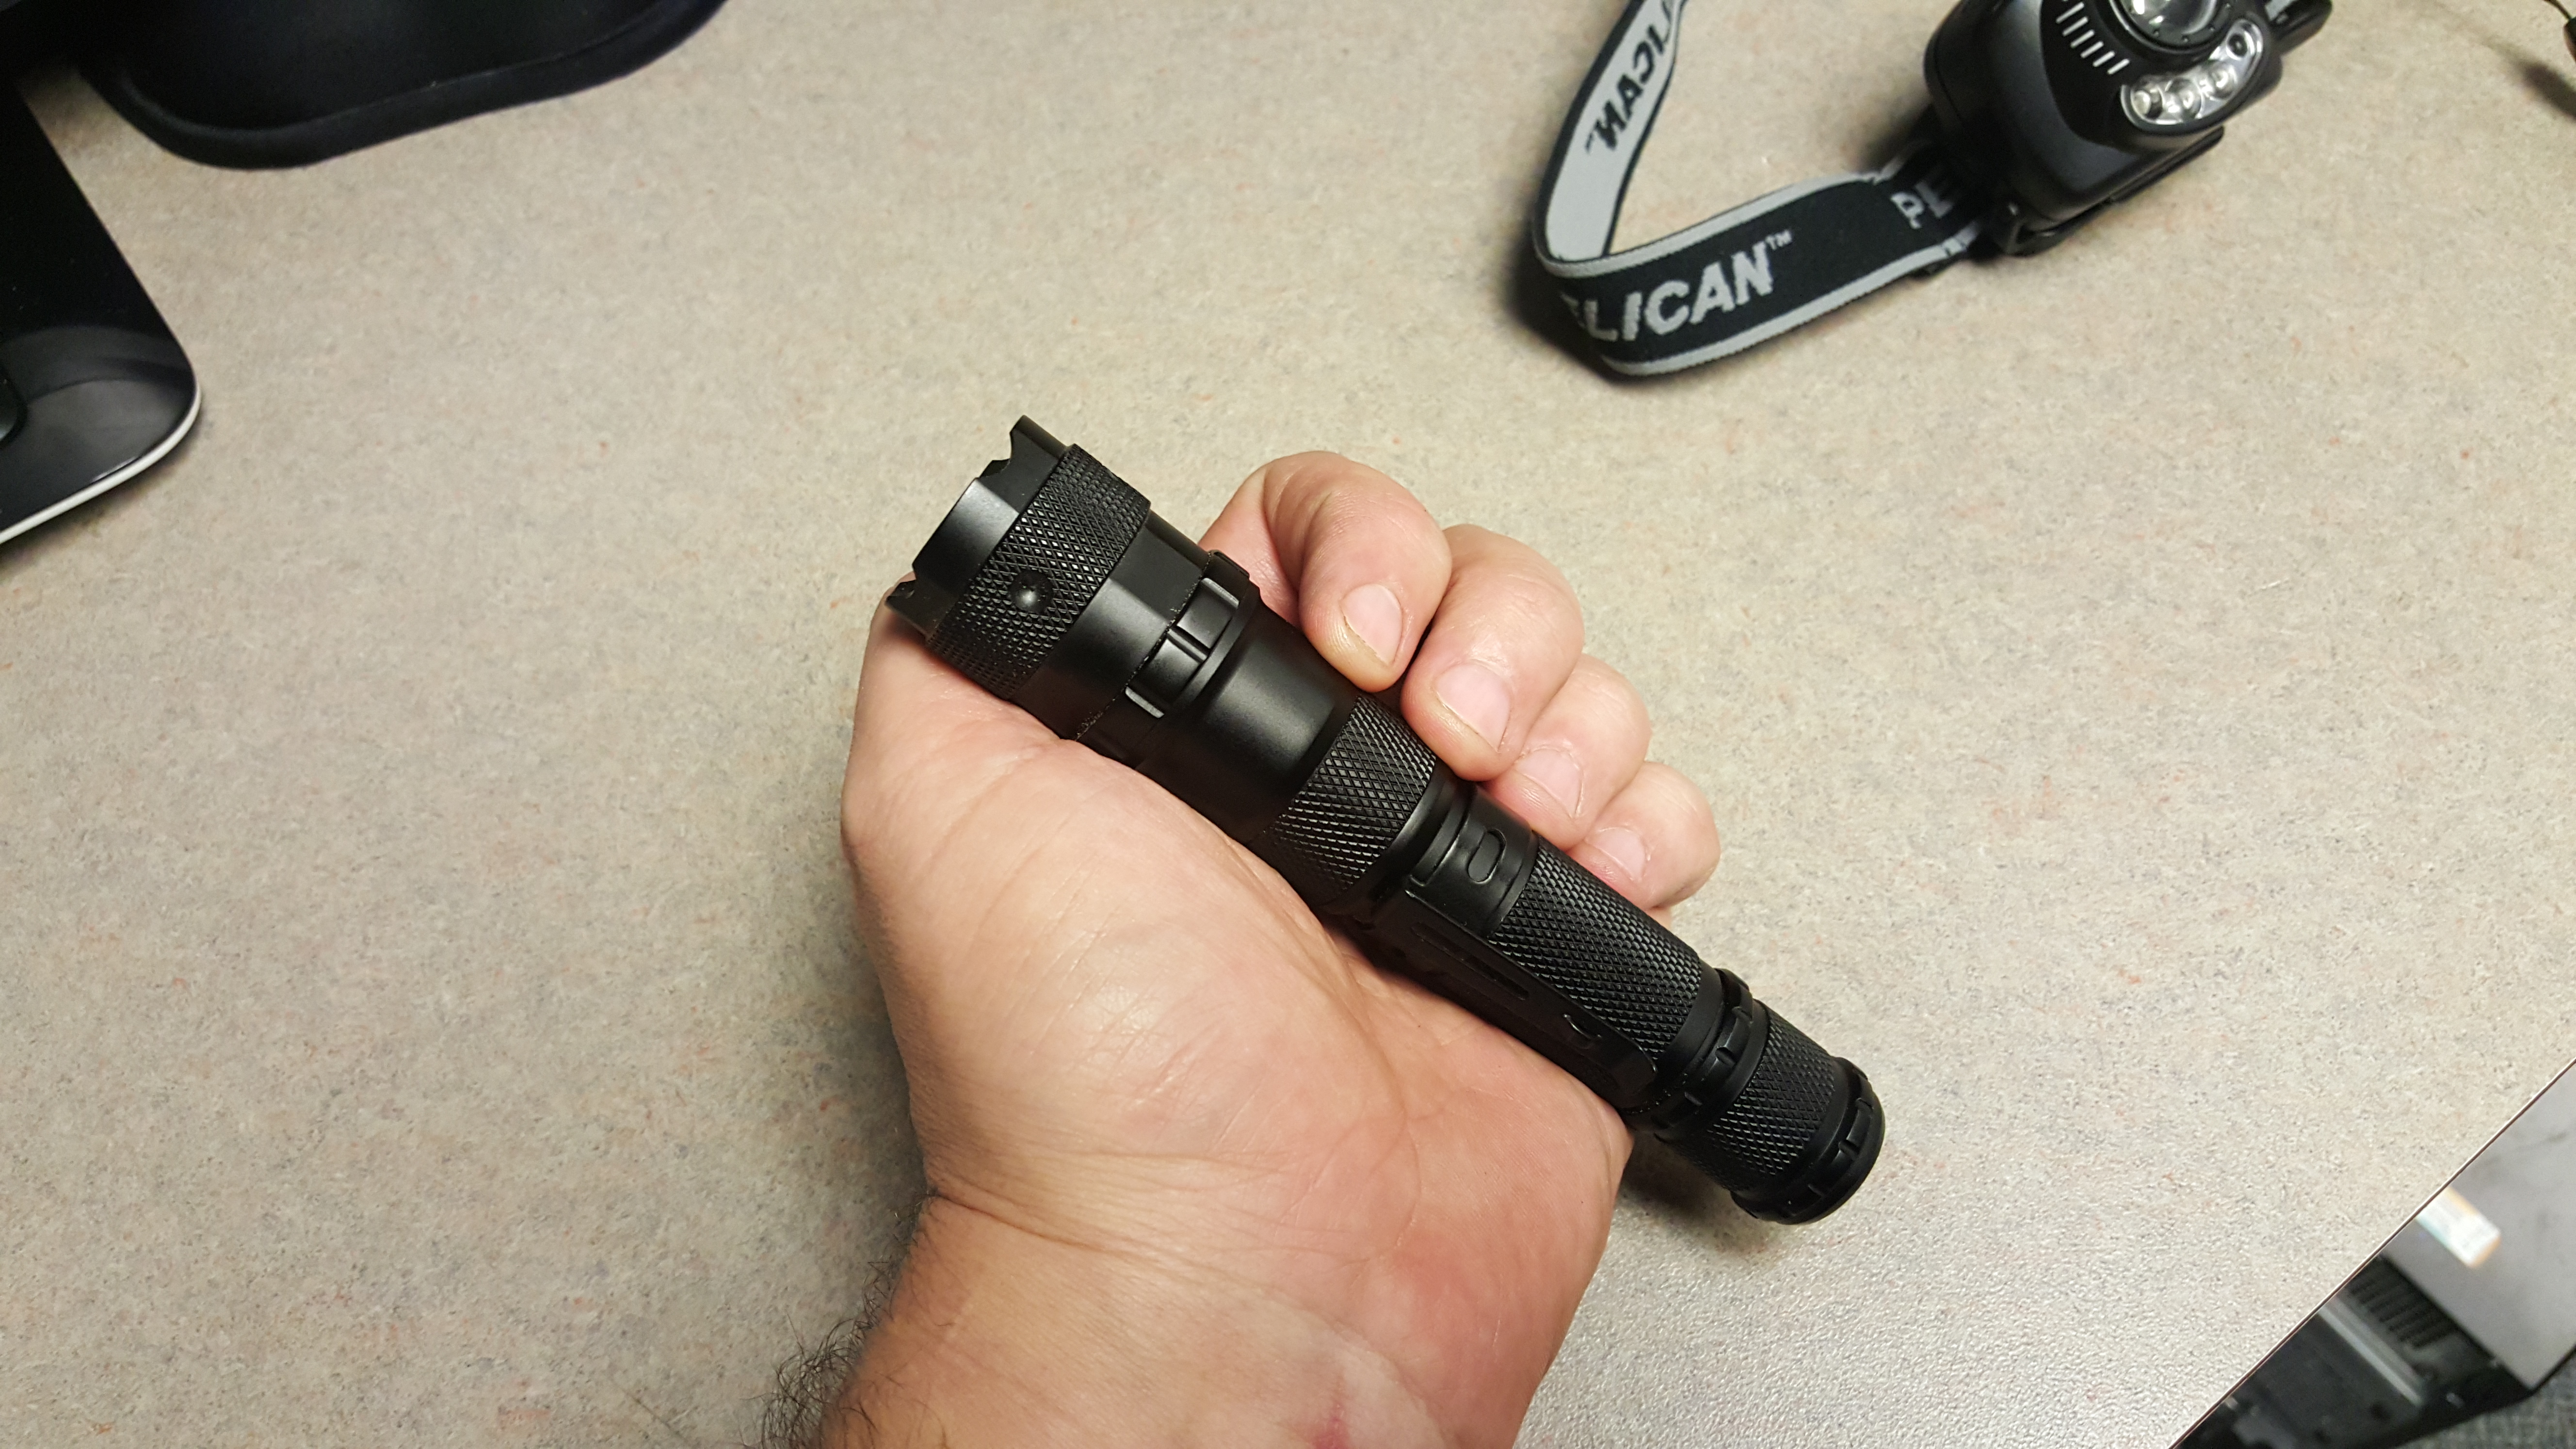
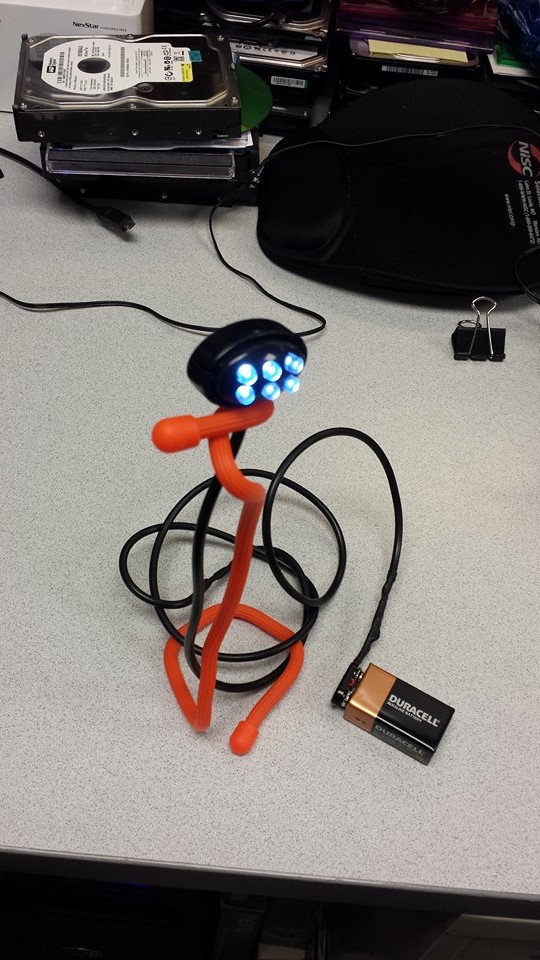
I have a couple other battery packs but they are getting used less frequently. I’ve been replacing the AAA and AA with rechargeable batteries which I charge off this Nitcore charger from micro USB. These batteries power my flashlights, headlamps, tent lights, radios etc. In the pic below, 2 of the 9V batteries are rechargeable. I have an LED light tied to an orange wire wrap that I can hang or stand any way I like. The 9V will run the LED for 420 hours continuously. Not super bright, but bright enough for a tent light or body light.

Nitecore charger. Charged my CR123 and 18650’s as well as AA and AAA batteries as needed. Obviously heavily used.
Handy battery packs. I’m slowly replacing half the batteries with rechargeable batteries, but I plan to keep some alkaline for emergencies.

This setup gives me pretty much unlimited power for every situation. By my estimates, my lightweight pack will run all of my gear with no sun for 3 to 4 days. My two main packs will run me for 7 to 10 days with no recharge, and my full kit will get me by 14 solid days with no recharge (all 3 kits together). With at least a solid day of sun every 2nd or 3rd day. These kits will keep me going indefinitely.


Getting Back to Firecord

Back in august of 2015, I tried out a new product called Firecord.  (Here is my original review).  6 months later I did another follow up review (Here).   Here we are almost 6 years later.   As per my first review I find that I don’t use it because I’ve always got fire starting kit on me.    But I test it periodically to see if it’s still functions well.   On my initial review, I noticed a light accelerant smell.  After a couple years on my pack, that smell is completely gone.  (Which made me wonder if the Firecord would still be effective).     

Pulls on my main pack

I’ve had some Firecord zipper pulls on my pack for almost 6 years now. They have seen rain, snow, sleet, dirt, dust, mist and every weather condition available including temps from -39 below zero to 109 above. The bag, when not in use is in the back of my van in both extreme heat and extreme cold all year long.

Don’t let the bright image fool you, it’s just the fancy camera on the Galaxy S20 Ultra. The orange is faded a bit.

I cut a 2 inch chunk off one of my zipper pulls and took it outside to test it.   It was still easily manipulated.  I rolled it up, scraped a part of it to fuzz it up, and hit it with some sparks.   BOOM.  Lit up just as well as the first time I tested it.  Burned for about 20 to 30 seconds.   I was amazed that it still worked so well.

Fuzzed it up a little in the middle

I’d have to say.  You don’t need much of it. The 25 foot hank I bought 6 years ago, I still have 15 feet of it rolled up in my bag.   The other 10 feet made zipper pulls for all of my bags and packs.   So I’ll honestly say you don’t need a lot of it.  But I think this is a good enough and cheep enough item that everyone should buy at least 1 hank of it and do zipper pull’s at the minimum.  (I am also going to use some of the leftover to add a cord to my newest couple of fero rods).   It appears to last fore quite some time. And after nearly 6 years in the conditions of my pack, I would expect another 20 out of it. Just the ability to fuzz it and have instant easily lightable tinder. Not every product meets and exceeds every expectation. This is one that does. I would buy it again. And probably will. At an average price of 6 to 9 per 50 foot hank for normal paracord. This ends up being roughly twice the cost at $14.99 for a 50 foot hank. Which is still not a large expense to have one hank of it on hand. (If you go through as much paracord as I do, you may not want to replace all your paracord with it. LOL But having a hank around with bits of it tied onto various pieces of equipment and gear could be a lifesaver years from now when you least expect it. And it’s such a simple convenient way to ensure you have some instant light tinder when you forget your regular fire making kit or just don’t want to hike back to the van or campsite to grab the lighter that you forgot. 🙂

Still caught a spark and burned just fine


Quick, Cheap and Easy, otherwise known as, How I Like my Gear Repair!

100% Silicon

100% pure clear silicon

Odorless Mineral Spirits

1 Gallon Odorless Mineral Spirits

A couple of years ago I salvaged a bunch of nylon tents and tarps that were going in a dumpster because they were not selling at the scout shop garage sale.  Some of this stuff was 20 to 30 years old and had been in storage at the scout shop for decades and they were clearing space.  I showed up an hour before they closed up on the last day of the “Garage Sale”, and I picked out 2 tarps and 1 tent.  But the fellow running the sale knew me and told me, grab as much of the nylon stuff as you want because it’s all going in the dumpster.   So I sorted through and found another half dozen old green dining fly’s, 5 or 6 old tends and two what I thought were rainfly’s but turned out to be Kelty Noah’s tarp diamond flys.   I was excited.  Until I started using it and most of it was so old it was not even roughly water resistant.  (About as waterproof as a coffee filter).   A couple of the tents turned out to be in decent shape, but the 6 tarps and the 2 Kelty’s were only good for sunshades.


I’ve meant to try out the re-silicone-waterproofing process on these but just never got around to it.  Well, I finally decided to try it.   Picked up a gallon of odorless mineral spirits $12.49, a 5-gallon pail $2.89 and a 12 oz tube of clear silicon caulk $3.99.

Mixed

Notice the mixture is perfectly clear, not white or opaque.

I’ve read of this technique with people using a 10 to 1 mixture of spirits and silicon up to a 15 to 1 mixture.   The 15 to 1 is the “Weakest” lowest mixture recommended to get full coverage.   10 to 1 is the maximum.  (too much and you get lots of silicon excess on the tarp which doesn’t hurt it, but can be a little streaky and may make the tarp stick to itself if it gets hot in a car trunk or something.  As it turns out the gallon is a 126 oz of mineral spirits, and the 12 oz tube so I decided to not bother measuring it. This ends up about a 10.5 to 1 ratio.  So a little on the heavy side as you can tell by the small amount of streaking I got on the dining fly.

Hung to dry

The two Kelty’s Noah’s Tarps and the rain-fly hung to dry.

I observed a fellow use a paint stirring bit in a drill to mix the silicone into the spirits, making the spirits opaque, almost white before he used it.  This left lots of streaks and excess silicone on his tarp.    I don’t recommend that, as you need the silicon to dissolve, not just mix.  So, I poured half the spirits in the bucked, then squeeze out the entire tube of silicone, then added the other half of the spirits.  I just slowly mixed this with a piece of PVC pile for about 6 or 7 minutes by hand until all of the silicone was dissolved.  The mixture was still perfectly clear, no white haze or silicone visible.  That’s when I knew it was ready.

Noahs Tarp No visible streaking

No visible streaking on the Kelty’s

I estimated I’d be able to do 2 of the dining fly’s and the 2 Kelty Noah’s tarps.   I managed to get the two Noah’s and 1 of the dining fly’s.  This takes some preparation because you don’t want to drag the nice wet tarps across the dirty ground.  So, setup your hanging area first so it’s all ready. Then pull your tarp down and start putting it into the bucket, in the reverse (starting at the bottom furthest from your hanging points).  Squeeze the tarp and mix it into the solution until it’s thoroughly saturated on the entire tarp.  My tarps are big, the dining fly’s are 10 x 12 and the Noah’s are 12 foot diamonds.   It took some effort to get the entire tarp in the bucket and mash it around like your washing laundry.  As I pulled it out, I noticed a couple dry spots where it was folded against itself.  So I pulled it apart and smashed it down in the mixture again.  The Noah’s were like sieves, allowing the liquid to saturate ever inch of them in a minute or two of kneading.  I pulled them out of the bucket slowly and squeezed as much of the liquid out as I could.  Hung it up and staked two corners to keep it taught.

Some streaking from the excess moisture on the Dining Fly

Light Streaking

This light streaking is only visible. There is no touch to it. It can’t be felt.

I proceeded to do the same thing with the dining fly.  It turned out to be a bit more difficult because it was still slightly waterproof. Each time I tried pulling it out I found more dry spots.  Took me abut 6 or7 minutes of dunking kneading and pulling it out and putting it back in to get it fully saturated. Got it hung up.  Because it was more waterproof, it also pulled more puddles of the mixture out of the bucket with it.  So, when I hung it up it was much more wet and took longer to dry.  I then did the second Kelty, and barely had enough liquid to finish it.  (In fact, the bucket was nearly dry by the time I pulled it out.  So, all 3 are now hung up.  I had read that it’s best not to dry super-fast on hot sunny days as the silicone “Bunches” up in spots.  Slow drying should give it a more even coat as the silicone attaches to the fibers.   My day turned out to be perfect.  Overcast, cool in the mid 60’s with a slight breeze.  Took about 2 ½ to 3 hours and the tarps were mostly dry (two corners on the last Kelty were still damp).  An hour later they were all completely dry.

The Kelty’s are a very light gray, almost an off white so no silicon was visible anywhere on them.  The dining fly is green and there was a little bit of silicone white streaking in a few areas.  It’s strictly cosmetic so it doesn’t bother me a bit


I then setup the rainfly and one of the Kelty’s in the yard and had my 11-year-old stand under them while I soaked them with a heavy spray from the garden hose for a full 5 minutes without a single leak!!   Not any drop, even at the seams which I sprayed extra hard did not leak a bit.   This is a short-term test, so It’s going to have to wait for me to be camping through a nice long overnight storm to get a feel for the longevity.

Perfect Beading and no leaks

Perfect Beading and no leaks

As an added bonus, this afternoon we got some rain.  So I sat outside in the cool weather typing this article up under my now 100% waterproof Kelty Noah’s tarp which the last time I used just poured water though almost every square inch.

puddle

After nearly an hour this puddle was still holding and no drips under it!

I HIGHLY recommend this method of waterproofing.  The cost ended up being roughly $6 per tarp.  It was an easy job, not as messy as I thought it would be.  Soap and water took the spirits and silicone right off my hands and forearms no problem.  (My bandage fell off and the small cut on my finger didn’t even burn in the spirits which surprised me).  I really wish I had not waited so long, I could have been using these tarps a long time ago.

Typing under a rainy tarp

Typing this article while sitting under my newly fully waterproof tarp in the rain. Spectacular.

I have 3 or 4 more of the dining fly’s to waterproof and then I may even hit up one of the older tents and try that.

Good luck and enjoy breathing new life into your tarps and tents and other nylon items.


Fire From the Gods? Whats in Your Pocket?

Picture yourself, The Middle Pleistocene era walking up to the cave, your fellow hominids are sitting around trying to rub some sticks together to get fire going.  You reach into the medicine bag hanging around your neck.  You grab something, reach down to the fire and push a button and PRESTO, Flames from the gods ignite the fire.  The rest of your tribe gathers around you, making offerings of animal skins and baskets of fruit, and slabs of thick cut meat.  Yes, Life is good.    Fast forward 700,000 years, and you can do the same, but may or may not be given all the offerings.

Yes, this is a review of a simple lighter, and should probably be 3 paragraphs, but where would the fun be in that?   So Today, I had a little more fun in writing a bit of a whopper of a review on such a simple item.   Mostly just out of a sense of fun. I hope you enjoy reading it as much as I enjoyed writing it.

The UST (Ultimate Survival Technologies) Wayfinder Butane Lighter with Compass

MSRP $14.99  Can be commonly found at Walmart for around $9.95.

2017-03-01 19.30.25

In the Package

Most comparable lighters online are in the $7:00 to $19.00 range.  Some similar lighters can be found much lower.  But I can’t judge quality of those in comparison having not used them.  There are some nice high end lighters with certified waterproofing and easier to use controls.  Look at the Delta Stormproof lighter for some of those higher end features in the $35+ range and you’ll see what I mean.

Before we get started, this question must be answered.  “Why a lighter?”.  You’re an outdoorsman, you can make fire with friction if you had to, matches are dirt cheap and easy to carry.  Heck, even a Ferro rod can make fire so easy, why on earth bother with a lighter?

To answer this question, I always start with a classic survival question.  You’re in a dire survival situation, sun is setting, temp is dropping rapidly, you have nothing on you but a ferro rod, a lighter, and the materials for a bow drill.  Which one are you going to light the fire with to save your life?  In a real survival situation, the lighter is the most immediate and effective means.  Could be windy, could be wet or raining and the match or ferro become a little more difficult to use, requiring more effort as your body reaches hypothermia.  You lose dexterity to operate some of these effectively.  (I have had hypothermia up to the point where my mind was starting to say “Lets just go to sleep, you don’t care anymore”.  Drown-proofing in a cold pool in October while in the Army.   I could barely grab a ladder to climb out of the pool, needed help.  Trust me, you lose dexterity in your fingers quickly and not long after that, you just don’t really care anymore).

Sure, out camping, just hanging out in the woods.  Take your time, make a fire with a ferro rod, or take the time to build a bow drill and do some fire by friction practice.    But even sitting around at work or at home, you need to melt some paracord ends?  The lighter is the quick, practical way to do that.   So, it just makes sense to keep a lighter on you.

I know some people are “Technology averse”, and may think technology is bad, and doesn’t belong in the field.  But even many of them still carry a lighter or other technology with them.  Mostly because it’s convenient and quick.  It’s just simply useful, but in the same respect, a lighter IS technology.  Just like a knife is “Technology” over a knapped piece of obsidian tied to a deer antler with some coyote tendons.  Technology isn’t bad, it’s just another tool to be used.  But like any tool, if you depend on it too much, if it breaks on you, your need to have the skills to use alternatives (like a ferro rod or a bow drill).  Dependence is never a good thing.  ANY piece of equipment can break or get lost (Even that $400 custom made specialty knife you love to death could accidentally be lost).  So make sure you have your alternatives, and your skills.   But don’t dismiss a tool because “Egads:  Technology”.  You’d still be carrying a knapped knife and wearing animal skins.  😊

2017-03-10 07.13.42

1 screw to access the inner workings

There are a lot of lighters available for all walks of life.  Some pretty high end super tough lighters on down to the cheap Bic knockoff lighters you can get at 50 cents each.  I used to carry the little Bics because they were cheap and disposable and the small ones ride in your pocket very well.   But they have the problem with the button being pushed while they are in your pocket and then the fuel leaks out and presto, you go to use it and it’s empty.    I’ve had them go empty in my pocket in less than a week and I’ve had them last for a couple months, but it’s a crap shoot.  Not something I feel confident enough in to trust my life to.

So, I have tried a couple of options.   In the Army I carried a Zippo, But soon discovered I didn’t care for them.  They tended to leak and dry out quickly.  And messing with transporting and carrying liquid fuel is a pain.  Sure, they looked cool, and it was fun to pull it out and snap my fingers and pop it open, but after a while I stopped carrying them.  I tried a peanut lighter and a forever match and a larger version, but would hate to try to use one if I was hypothermic, and both still leaked and aren’t as convenient as a thumb operated lighter.   After that I used Bic’s.  Then high pressure butane lighters started getting popular.  I have purchased a couple from gas stations in the $5.99 range on up to the $17.00 Spark Multi-tool butane lighter (Which turned out to be a total piece of junk, don’t ever waste your money on it).    Most just don’t stand up to pocket carry well.

My last butane lasted about 3 months before the cap broke off.  So, I have been in the market a for a replacement, but didn’t want any of the same old versions I see everywhere.  I was at Walmart and I’ve had mixed feelings about UST gear.  Some UST gear is a great value, the Spark Force Ferro’s are great, I LOVE the Polymer resin carabiners, lightweight, nonmetallic, tough enough and work great.  The small tarps are decent, (I don’t care for most of the cutlery as previous evaluations have shown).

2017-03-10 07.49.10

At this angle you can make out the rubber seal

The Wayfinder Lighter from UST was hanging in the camping section at Walmart.  I decided to give it a try.  I didn’t expect much.  Cheap plastic shell, button compass on the side.   But figured, it had to be better than the spark that had failed horribly.    Got it home and opened it up and was surprised.  It’s much more solid than I expected.   I popped the lid open and first impression was “No rubber O ring so not waterproof.    Which turned out to be my mistake. (Hey, I’m human, I make plenty of mistakes).   The lighter housing is chrome and there is a rubber gasket, but it’s so small and so close to the edge it’s lost in the reflection of the metal.

2017-03-10 07.51.14

Easy  flame control as long as you have a strong fingernail or knife

Once I figure out there was a gasket, I had to do some water testing.  This lighter is not billed as waterproof, it doesn’t say waterproof in the specs or on the packaging.  But I did 2 water tests.  I put it in a glass of water (This does not float, they do have some available that do but I don’t care for the more squared designs, I like rounded edges for pocket carry).    I did the first test for 5 minutes.  I was not surprised to see a lot of bubbles coming up.  Figured it was leaking.   But Pulled it out and low and behold, the chamber was dry.   (Turned out the water was going into the tiny chamber where the rocker arm is that houses the cap release, so the water didn’t enter the lighter at all.     After 30 minutes in water, it was still bone dry and worked fine.   There is a screw on the base that allows you to remove the lighter from the housing also.

2017-03-10 07.49.21

Latch Down, push button to release cap

The lighter works well, it does come empty so buy yourself a bottle of butane to fill it.  If you use butane lighters, you probably already have a bottle at home.  😊

The compass, It’s a standard button compass.  It works as well as any button compass.  Much like anything else, it doesn’t need to be there, but why not, doesn’t hurt anything and it’s still a compass and still works.

2017-03-10 07.49.31

With locking latch closed.  It has not come open in my pocket yet.

It has a great latch system.  Easy to operate 1 handed, and the flip up wire lock keeps the cap secured very well.

2017-03-10 07.51.30

Lanyard hole and compass

The flame is adjustable via a small turn screw on the bottom around the fill port.  This does require something akin to a knife or strong fingernail to turn.  Depending on the altitude you’re at it may need adjusting.

2017-03-09 14.52.42

30 minute water test was successful. The bubbles are from inside the thumb release, not the lighter itself.

All in all, it’s a decent lighter at a reasonable price.  There are probably better buys out there, higher quality, lower price, so find something you like or that fits you, but for the price, this is a decent little lighter and everyone should have a lighter in their pocket anyway.   Now, I’ve only had it for a week, so only time will tell if it’s tough enough to stand up to my pocket carry.  (I’m going to keep an eye on the rocker pins which I think are its weakest point).  I have high hopes and reasonable expectation. LOL   I’ll come back again in a couple months and let you know how it’s fairing.

2017-03-10 07.52.21

Lid Opens past 90 degrees, easier to get the flame to tight spaces.

Pros:

  • Tough plastic shell (I did more than 20 drop and toss tests with it and it’s still running just fine)
  • Adjustable flame
  • Cap is spring loaded and stays out of the way.
  • Solid latch to keep the lid closed and waterproof
  • Compass, (Why not? LOL)
  • Lanyard hole to add a lanyard if you like. (Could attached it to a pack if you wish.
  • Cap opens past 90 Degrees (many capped butane lighters do not, so they can be tough to get into tight spaces)
  • Bright Orange. (I like bright colors for pocket carry stuff, easier to spot in the grass when you drop it).

Cons:

  • No rubber grip. (This is more of a personal preference, it does have a good texture cutouts, but I like a non-slip rubbery grips)
  • No shock absorber built in like more expensive versions. (Not sure how useful that really is, as I have done dozens of 5 to 8 foot drop tests and a couple of 20 foot “Toss” onto concrete tests and it’s fared well.
  • Flame doesn’t get as high as some other lighters.


DIY – Leatherman ALX Sheath

2016-09-30-06-59-58I’ve been wanting to do this project for a while.  After my last factory sheath died a horrible death on my belt.  I decided I wanted to build one myself.  I didn’t like the sheaths that were available in other materials besides leather.  But the leather sheaths I found were either custom, and far too expensive for me (Even though I would LOVE to have some of them) but also, the factory sheath didn’t have the features I wanted.  So I set about and designed one of my own.

2016-09-30-07-00-11

This is what I came up with.  Unfortunately I didn’t document the process, I was just in a hurry to knock it out and get it back on my belt.  I had missed it for quite a few months.

The leather is not as heavy as I would like.  This is about 3oz leather.  A heavier 5 oz would be better.  But this is scrap I had laying around (Did I mention I’m a cheapskate LOL).

2016-09-30-07-00-20

The most important thing I wanted was to be able to carry the bit kit with it.  In my first Leatherman sheath the bit kit rode in the sheath in a similar manner, but was always getting stuck and difficult to pull out.  After that sheath broke, the canvas sheath had a stretch fabric to hold the bit kit and the corners of the bit kit tore it up really fast.

This is hand punched and hand stitched.  The snap was from a kit.  This is just the prototype and it has a tiny bit more play than I intended.  So the next will be a tad bit tighter.  I did wet-form it around the weatherman wrapped in a Ziploc bag to get some definition to the sheath, but it could stand to be a tad bit tighter.

2016-09-30-07-00-33

I didn’t have the bottom cut out as I intended to have it sealed, but once I started stitching I discovered that that would not work.  So I cut a half moon on the bottom and that corrected it.  Due to this modification, the Leatherman can be carried opened up in the pliers configuration.

The stitching is done with a waxed natural hemp cord.  This stuff is very strong for it’s size and has the more natural look than modern threading.  I died the leather with a Sedona Red stain.  Helps protect it and the deep redish color makes it fit in well with bot jeans and my dress clothes for work.

2016-09-30-07-00-43

I also extended the belt loop up  a bit. Both of the old sheaths rode high on the belt and would occasionally poke into my side sitting in chairs or in the car.  This longer loop allows it to dangle down a tad bit more and has a little more flexibility.  Much more comfortable to wear.

I did stamp my initials on it, but did not do it very deep.

I’m going to duplicate this sheath with some heavier leather.  This was just the practice and concept version.

It’s obviously nothing fancy.  None of the refinement you’ll see in leather goods produced by true craftsman.  But it gets the job done and as in life, everything is a learning process. You don’t have to be an expert.  You just have to make the effort.

This is also proof that anyone can do this.  A leather punch, some thread, a sharp knife (I use the Tibo from the previous review for all my leather work) a big needle and some cheap scrap leather and anyone can do it.  I learned a few things building this, and when I do the next one, it will be better, and each time I do something after that, it will be better.  So keep working on your projects, they will improve.  I have no talent when it  comes to crafts like this.  If I can do it, anyone can do it.  Pick up some scrap leather and start playing with it.  Make a small bag, or a phone cover or something simply just to get started.  Before you know it, you’ll be making really useful stuff that will last a lifetime.

Hope this inspires you to get out there and build something.

Doc


Tops TIBO Full Review, The Little Knife that CAN!!!

Finally, a TIBO Review!!  This has been a long time coming. I’ve had this knife for many, many months now.  I’ve known the designer, Brian Griffin for several years though a couple forums and Facebook and many mutual friends.  Real stand-up guy who knows his trade and knife design and use incredibly well, one of the absolute best.    Which is one of the reasons this review has been so long in coming.  It’s difficult to be truly unbiased when you’re close to the person whose gear you’re reviewing.    I needed to fully put this knife through its paces to ensure I knew the design well enough to do that objectively.

It's a nice looking and very well handling knife.

It’s a nice looking and very well handling knife.

The Tibo “Which means Stinger” (Which this knife does have a great point) is produced by Tops knives.  There are various runs of the knife, both a carbon steel version and a special limited run of cryo dipped CM154 Stainless.  (Cryo Dipping is a type of tempering at sub -300 degree temperatures rather than room temperature Oil or Water).  This is an excellent technique for hardening stainless steel alloys.   If I remember correctly, there are only 124 of this model of Tibo and all were sold before production.  So you may find it difficult to find one of this model.  I do not own the 1095 steel version available on the website, but after owning other 1095 steel knives from Tops, I’m sure the 1095 Tibo is right on the money with the rest and is identical to this model.

Blade shape lends itself to many functions.  I like using it on fish.

Blade shape lends itself to many functions. I like using it on fish.

Tops does a great job with their knives.  My wife has a Lioness, and I have a HOG, both of which are 1095 carbon steel and came from them with excellent edges right out of the box.  So when I received my Tibo I was surprised to find the final grind was far steeper than on the other knives and it wasn’t nearly as sharp as other knives out of the box.  I played with it for a day or two and decided I’d need to re-profile it a bit.

Late night fuzz sticking

Late night fuzz sticking

So I sat down with my files and stones and spent about 40 minutes lengthening the edge bevel.   I did not measure the bevel, but based on the angles on my other knives and experience, I’d estimate the bevel was around 35 or 38 degrees.  VERY steep for a small knife.   (Sure, this would be a good on a much larger knife used for chopping, but on a small “Finesse” style knife, it was just too steep.   This may have been just a 1 off issue in the limited run, Since I haven’t seen any of the other recipients of this knife make any mention of the issue.

By a nice glow.

By a nice glow.

I took the edge down to around 25 degrees which is where I keep most of my knives.  Just a good balance between sharpness and durability.  From the minute I finished the edge, this thing has been a WORKHORSE cutter that holds an edge extremely well.  It’s one of my favorite fish cleaning knives.  Normally I’m not a fan of “Skeleton” knives and I truly dislike paracord wrapped knife handles.  If a knife was meant to have scales, put scales on it.  Wrapping paracord is a poor stopgap for good quality scales.  For me and the way I use knives, a knife should have good ergonomic scales, and as much as I understand and appreciate the ultralight neck knife concept, It’s just not something I prefer.   I’ll give up a few ounces and a little bulk for a more useful set of scales.

Wonderful belly, makes short work of cutting tasks.

Wonderful belly, makes short work of cutting tasks.

However, for small skinning/cleaning jobs where I won’t be spending an hour cutting so not enough time to develop hotspots and blisters, a skeletonized knife is excellent and easier to clean.  My preferred use for the Tibo is cleaning fish.  The Tibo EXCELS at this task.  It cuts through fish bones like a bigger knife, and the point is “Pointy” enough to start into the flesh without a lot of force and allows you to get between spinal bones easily and zips through skin and flesh.  I’ve always been a fan of the drop point and the shape of this tip is dead on perfect.

Well made kydex sheath.

Well made kydex sheath.

This knife is one of the few knives I own that has a long continuous belly.  Most knives have a long straight edge and then go into the belly near the tip.  The Tibo has a nearly continuous belly that gives it a tremendous cutting surface for a small knife.  The entire belly is useful.  Making this knife operate like a bigger knife.  I have not skinned or cleaned any mammals with it yet, but considering the way it works on fish, I don’t think I’ll have any trouble with rabbits and squirrels or even bigger game.   In cleaning fish, a fairly messy, bloody, “Gutty” job, the purchase with the Tibo is excellent.

tiny tight little curls.

tiny tight little curls.

Now, my one and only con for the Tibo, (And it’s really just a personal thing, it’s not detrimental to the knife as everyone has their own preferences much like serrations) is jimping.  I’m not a fan of jimping, I’ve used knives gutting fish, cleaning animals, (I’ve worked on 2 deer with several knives) and doing wet work on meat and even when covered in blood and guts and fish slime etc., have never had a knife so slick (With blood or guts) that it needed jimping on the spine for grip.  I don’t mind a little light checkered jimping as an “Index point” to let me know where my thumb or forefinger  is on the knife, but big aggressive jimping just isn’t my thing on a knife.  The spine jimping on the Tibo is very aggressive.  (In fact I used it as a saw to cut perfect square cuts in some sticks).  But for just regular use, I would prefer it to not have the spine jimping. (The butt and finger jimping is perfect, not too aggressive, and doesn’t rub under normal or heavy use).  But if you spend a lot of time with your thumb on the back of the spine for fine work, you may find it a bit too aggressive as well.

Excellent for fine work on some good hard dry wood.

Excellent for fine work on some good hard dry wood.

One of the greatest parts of the tibo is the longer, fuller handle for a knife this small.  Most “Mini Knives” or “Neck Knives” have short handles (length and depth) to keep them small and lightweight.  With the Tibo, the handle is respectably long enough for a full purchase and shaped well for a hand filling feel.  One of the best design decisions I’ve seen is to keep a more useful handle.  The larger handle coupled with the nice long full belly of the blade make it work like a bigger knife.  So you still gain the best of both worlds, smaller, lighter knife that works very well for most every task you throw at it.

It is now my backup knife to my HOG, and it’s always in my go bag in the car, and gets put into my day pack when I hit the trails.  (I am thinking of building a custom angled IWB sheath for the Tibo so that it can always be on me.  I’m just not a neck knife guy so I just can’t get used to having it around my neck.

The heat shrink and leather.

The heat shrink and leather.

It comes with a Kydex sheath that is small and perfectly fit to the knife.  Tight enough that there is no wobble and no worry about retention.  Takes a hefty yank to pull it out.  It has a free hole to add a ferro rod clip or to attach it to another sheath.  I was planning on purchasing some aftermarket scales for it, however, I had an idea.  I grabbed some heat shrink tubing from work, cut a piece and shrunk it around the handle. It worked well, but shrunk further than anticipated.  So I cut it off and made a longer piece.  I also cut some leather fillers to put under it.  placed the leather on the handle, slid the tube over it and shrunk it.  This turned out spectacularly.  It gives the handle a little give which makes it incredibly comfortable, and very “Grippy” from a density standpoint.  Not as soft as rubber, which can give too much and cause problems, but not as hard as other materials.  Really good sweet-spot.  It is a non textured heat shrink but good semi-rubbery grip.  However, I’m considering heating up some pliers with crosshatch checkering, and roll them over the handle to add a tad bit of texture.

leather fillers on handle

leather fillers on handle

With the Tube and leather.

With the Tube and leather.


It is so sharp and stays incredibly sharp for long periods.  I use it in place of an exacto tool for all of my leather work because it’s ergo’s are better and the curved belly makes it a joy to cut leather with.  I used it to do all the leather work for my Leatherman ALX sheath and it was superior to the exacto tool in every way.

Trimmed to match the sheath.  Perfect fit.

Trimmed to match the sheath. Perfect fit.

Good thickness, barely any thicker than the kydex.

Good thickness, barely any thicker than the kydex.

Finished and trimmed

Finished prior to trimming

If I had to pick a great companion, or small knife, The stainless Tibo would be high on that list.    Hands down this is one of my favorite small cutters.  The ergonomics, all the little details that went into it, all come together to make this an outstanding knife.  I’m waiting for the next run of stainless Tibo’s so I can get them for my boys as well.  (I swear my 16-year-old keeps trying to steal this one LOL).

Jimping on the spine makes great notches.

Jimping on the spine makes great notches.

Here are the specs on the Tibo.  (This is the same for both the 1095 and the CM154 versions).

  • Overall Length: 6.50″
  • Blade Length:        2.75″
  • Blade Thickness:  0.130″
  • Weight:      3.2 oz

The Tibo comes with a Kydex sheath, and there are some great aftermarket sheath and scale options available for it.

If you are looking for that small knife, backup or neck knife or piggyback with your big cutter, then this is a knife you owe it to yourself to check out.


Lighting Your Way Today

Considering that roughly one third to one half of every day is in the dark (Depending on where you are and the time of year, and not accounting for storms, eclipses, giant spaceships blocking out the sun, etc.) one of the more critical things we as human beings rely on is light.  That could be candle light, kerosene lantern light, firelight, electric lights or battery powered lights.

I always carry a flashlight on me, in fact, I generally have two or even three depending on time of year and clothing.  If I’m running around in shorts and a T-shirt, I’ll have 1, I have a spare in my spring jacket and when wearing heaver clothing I keep 2 spares (1 spare hand light and a headlamp for hands free use).

3 lights

Lots of light in a small amount of space

Any ole flashlight will do in most situations.  I was lucky enough to see a motorist one night (-28 degrees, middle of winter) trying to change a tire in the dark.  I pulled in and walked up to see if I could help.  He didn’t have a flashlight and could barley see what he was doing and had already spent 20 minutes in the freezing cold feeling around and figuring out how the spare tire release and jack worked in the dark by feel.     Simply pointing a light allowed him to finish in 3 or 4 minutes what would have taken another 10, (And would have turned a 30 minute job into a 7 minute job had he had it to begin with), which in that kind of cold might save a few digits.   Keep a flashlight in your vehicle at all times.  (I recommend you put it in a Ziploc bag with 2 sets of battery’s,  don’t load the batteries in the light or they may corrode and make it useless when you actually need it).  This can be a cheap flashlight.  Most alkaline batteries will last 8 to 10 years so you have plenty of time.

I do recommend going with an LED light over a bulb light.  If you use bulb lights, throw an extra bulb in with them.  However in this day and age LED’s are just as inexpensive now and offer both equal lighting AND longer battery life.  Can’t really go wrong with them.  They also work in temperature ranges higher and lower than bulb lights.  (I’ve burned a couple of mag-light bulbs in sub zero temps back in the old days (yeah, I’m 45 LOL) so the spare is always a must).

I also recommend keeping a headlamp in place of a standard hand light for most “Storage” lights, like home, car, pack etc.  (EDC “Every Day Carry” light exceptions we’ll discuss in a minute.   Head lamps have the benefit of keeping both hands free and if it has an adjustable angle bracket, can really keep light exactly where you need it.  i also discovered that as I got older I developed a gag reflex if I hold items in my mouth like a flashlight.  When I was younger I could do it all day.  Now, if I hold something in my mouth like the butt of a light for more than about 10 seconds, I start getting the urge to vomit.  Not sure why this came up on me as I got older, but it is what it is.

EDC lights:  I carry three lights with me most of the time unless it summer and I don’t have a coat or lite jacket (no pun intended. LOL).   Four if you count my FAK/Pack light.

I’ll go over the 4 I carry and why I carry them and their particular features.  Everyone has different needs, so by all means, do the research, find the lights that work best for you and your purposes.   This is just to help you see my own thoughts and if they help you figure out what works, great!

2016-03-16 14.06.48

Olympa RG245

First of all, my pocket light, the one that is on me everywhere all the time.  The one I use the most.  I got lucky on this one, I picked up an Olympia RG245 for about $30.  This light is typically $42 to $55.  Now, everyone knows I like value. I don’t generally go spending $40 or $50 bucks on a piece of gear unless it’s critical.  And when you can buy inexpensive led lights for $8 r $10 that can take some abuse and work well.  It’s hard to justify spending more.   But it’s worth it.

What you get for the extra money are a few features that are very useful.    Good circuitry that allows for even battery usage and extend life of the battery.  A temporary flash mode to let you know when the battery is getting low. (Otherwise it would just suddenly shut off).  Instead of a light that is just turned on or off, you get multiple settings.  There is a high beam good for defense to temporarily blind an adversary or at least interrupt their vision.  Or when you need a lot of light to light up a large area or see a good distance of 245 lumens.  This runs for about 1 hour on a single CR123 battery.  The second mode is a medium mode (just 1 more click of the tail cap button) A little less than half the brightness (about 110 lumens) which is good for most tasks, I spend most of my time in this mode.  The battery will last about 3.5 hours at this light level.  The low power mode is 20 lumens and the battery will last for an amazing 45 hours.  I’ve used this mode a lot when I’m camping and I need to get something out of a bag or light a stove or something.  Doesn’t completely destroy your night vision but offer plenty of light even to read by.

There are also a couple other modes like Strobe and SOS.  Strobe flashes rapidly which can be used for signaling and can improve performance in foggy or smokey conditions.  The SOS mode is useful in case you are hurt or need help.  You can set it down and let it flash for you.  It flashes the light in the universal Morse Code SOS pattern (dot dot dot dash dash dash dot dot dot).

The light is small, easily fits in the palm.  I wouldn’t call it a defensive light like some of the slightly larger lights with raised ridges that can be used as a kubaton.   CR123 batteries are a bit more expensive, but the lifespan and power they produce are well worth it.  It would take a flashlight large enough to hold 2 AA batteries to get the same performance so it helps keep the light small.

I prefer the hooded tail caps like the Olympia because they don’t get turned on in your pocket the way side switch often do.  And they are much faster and easier to deploy than the twist off/on style.   Although even with the hood, I have on occasion turned it on in my pocket and the temperature after a few minutes goes up enough to let me know I did it.  As you can tell by the picture it’s well worn and function quite well.  It’s been dropped many times and that solid state circuitry and LED still work great.

2016-03-16 14.06.55

The second light I keep in an inside pocket of my jacket is a hands free light.  I’ve had a lot of the cheap little 30 and 50 lumen single LED headlamps that cost about $12 bucks and they work, but don’t seem to last very long.  My father in law had given me a pelican headlamp many years ago that lasted me 12 years of horrible abuse and is still going strong so I decided to see what the latest and greatest Pelican because I knew it was tough and would last me.  Not only was I happy with their latest models and features, I was quite surprised by the price.  I only paid $31.99 for the Pelican 2720 headlamp.    This thing has every feature I could hope for and a bunch I wasn’t even aware of.  Since this would be my primary “Work” light.  I was looking for features.  Simplicity is great, particularly in an EDC light, but for the main workhorse, I wanted a bit more and this thing nailed it.

  • Just a quick rundown of features.
  • Low level Red LED night vision that helps preserve night vision
  • Variable light mode from 100 % (200 lumens) for 3.5 hours all the way down to 12 lumens with over 100 hours run time.
  • Output magnification and beam control, can make it wider or narrower as needed.
  • 3 standard AAA batteries, easy availability
  • touch-less on off controls for when your cleaning game or or processing food and don’t want to touch it.
  • SOS beacon (Just like the Olympia).

Yep, this thing does it all.  And at $32.00 it’s tough as nails, waterproof and really just does it all.  The head-strap is outstanding, (I personally prefer the single strap on this model without the center cranial strap but to each his own).

2016-03-16 14.07.15

The backup light as I call it is a slightly larger light that I picked up through an online offer.   I believe it was around $30 or so just for the light but I got the full kit with it for that price.  It’s a Gun Shack G3 (Branded form the Helotex G3) but for the life of me I can’t remember what I paid for it.

This is a unique light because it came with all the connectivity for a weapon light with external switched and end cap, as well as conversion pieces to switch it between a dual CR123 and 3 x AAA so if you can’t find CR123’s where you are, you can sure find AAA’s.  Its a big handful of tough weapons grade aluminum with some serrations or “Skull Crusher” ridges on the front bezel.  It’s 160 lumens is not as “Tactically” strong for defense as the smaller Olympia I carry, but still plenty strong enough to interfere with vision.  (Anything over 120 lumens is considered defensively bright).   The flexibility of this light makes it a good backup light.

1514958_616115941818824_5309668979159821656_n

The last light I carry is my pack light.  This is actually a custom light prototype created by the owner of Z.A.S.C.  (Zombie Apocalypse Survival Camp) Guy Cain.  Which I have been involved with since ZASC’s inception.   You can build this or a similar light pretty easily buying the parts online fairly cheap.   We never produced these lights, but may at some time.  It’s starts with a sealed 6 panel led that does 18 lumens (3 lumens per LED) Then that is wired to a 9V battery socket.  I added a flexible wire “bungee” strap that allows me to hang or stand or strap the light wherever I need it.  The best thing about this light is the time it runs.  On a typical 9V batter this light ran for just shy of 500 hours.  Yes, I ran this light continuously on a single 9V for 21 days straight.  If you were to just use it during 8 hours of darkness continuously, it would run for about 2 months, and if you only used it for an hour a night (more typical usage), it could go for nearly a year and a half on a single 9V battery.  This is a great little light.

I hope this info helps you find the ideal lights for your daily treks and shows that you don’t have to break the bank to be the hero when the lights go out.  🙂

Doc


Spork Showdown!

We’ve all seen them, seems to be a new model every month.  Plastic, metal various shapes and sizes.  So I decided to give a couple of them a go and see what I liked and what I didn’t like.   I actually surprised myself.  One thing we bush-bums or outdoorsman are always trying to find the best bit of gear.  That usually means the smallest, toughest most useful and longest living piece of gear we can find for whatever task we want it to perform.  Nobody wants to haul 40lbs of gear down the trail if they don’t have to.  However, I’m not a minimalist, I won’t trade value for small bits of weight.

I prefer gear to be robust AND a good value.  I wont spend 3 or 4 times as much to shave off negligible bits of weight.    many times the loss of weight has too many trade offs depending on what piece of gear it is.

I’ve often wanted to grab one of the CRKT Eatin Tool’s.  I have always been a big fan of CRKT because they are one of the best values in tools out there.  You really get a lot for the money you spend.   I just happened to be stuck at Target and going through their limited bit of outdoors gear and they had a couple of clearance items.  Low and behold the CRKT Eat’n Tools were there and on sale for 2.99 (Normally about $4.00 to $6.00 depending on where you find them).  Figured what the heck, I grabbed one for each of the kids and my wife.  They came in several colors so that everyone could tell them apart.   I was then looking at the CRKT Eat’n tool XL online the next day, My wife had me order her something and I didn’t pay attention and accidentally ordered the one I was looking at.    Was pretty surprised when it showed up.

2016-03-12 15.47.33

The whole gang!

I was then at Walmart the next week and I saw the heavy duty plastic eating sets so I grabbed a bunch for the Boy Scouts.  Figured I’d mark them and give them to each scout as a gift.  They were only $.88 each.   Well I was at Walmart, I also discovered a new spork/knife combo set similar to the CRKT from their “Ozark Trail” line.   Since it was only $3.00 I figured what the heck.  Grabbed a couple of them too.

We’ll start with the plastic set for $.88 Cents.   The good, Full size regular utensils.  Tougher than the cheap plastic disposables.  They have that “Rough” plastic texture that makes them a little more non stick that purely smooth plastic ware and they feel good in the hand.  But while your using them, you just can’t help but feel like they are disposable.   Personally, I think they make a wonderful addition to a car camping group kits or scout patrol boxes.  Not going to break the bank by any means to keep a dozen sets available and nobody gets upset if one breaks.   Being just plastic, I would worry about long term durability and are you going to open your pack after dropping it after a long days hike to find them snapped in half.    Never fear, they are well worth the cost at just $.88 cents.  The other thing going for it is, the spoon is big enough to really eat soups and other liquids!  They are kept on a plastic ring that is very weak.  In a box of goods it will keep them together, but I wouldn’t expect them to hang from it on a cook-set or anything else that gets tossed around for very long.


Next up is the CRKT Eat’n Tool  This guy runs from $3.95 to $7.00 depending on where you find them.  I’ve heard from people that it’s too short so I’ve always put off trying it until I could get the XL version.   But finding it so cheap, I figured what the heck.  I also thought it would be too short.  I also thought the wide top of the handle would make it very awkward. Turns out I was wrong on both counts.  You hold the wide handle across the top instead of down the middle like you would a regular spoon.  It seems awkward at first, but after a couple of bites, it’s as natural as using any other spoon.

The “Tools” built into it are kind of a gimmick, sure, if by some chance you ever needed to turn certain sized nuts or open a bottle and all you had on you was your spoon, they could be handy, but to me, they just add extra places for bits of food to get stuck or missed when washing.   Sure the cutouts do keep it even lighter, but as light as it is, the trade-off is negligible.  It is a solid tough eating tool, equal to or surpassing any metal spoon you might normally have.   The length might be an issue if you are eating out of a deep cup, like the Stanley I have here.  But all in all, I was impressed with the little guy.

The biggest downside to me is the “Spork” function.   The tines are not long enough to use as a fork, at best if you have a tough piece of meat, you might be able to stab the spork into it to eat it. It would be most useful for holding down something to cut, like a steak for example.   But realistically, even a perfectly round spoon can hold a tough steak down to cut it with one of my knives.  The spork cuts reduce the amount of liquid the spork will hold when eating soups or other liquid filled meals.  I’d prefer to see the spoon left without the spork cuts.  There is just limited usefulness for them.

The Powder coat was already showing signs of wear after the first meal and my son carried his on his belt with his little mini kit and it chipped off several pieces pretty rapidly.  I don’t think the coating would come off fast enough to be a health issue.  But I would definitely recommend the bead blasted rather than the painted versions just because of the paint.  But even with the paint they are still outstanding.  The paint is a non-stick coating so cleaning them is a breeze.  I can HIGHLY recommend this tool for most everyone, with the caveat that it might be too short to use in a tall or deep cup or can.  Also the mini carabiners are not going to last.  In fact my son broke his within 20 minutes just clipping it on and off his kit.   I’d recommend doing up a different method like a paracord loop double through the hole to a tougher carabiner.


So, Now on to the CRKT Eat’n tool XL version.  I figured this guy would be awesome.  All the features of the regular eat’n tool with a full length handle!   Well, I was surprised when I got it.  It is HUGE and extremely heavy.  You could use this thing to dig a fox hole or quite possibly jack up a car.  the extra length is good, but the shortened rounded spoon with spork cuts still has the same issue with liquids as the smaller Eat’n tool.  Because of the full length, its a bit heavy to use it held sideways over the back like the smaller eat’n tool, but the extra wide handle makes it awkward to hold like a regular spoon.

Did I mention this thing is HEAVY DUTY.   It almost feels like eating with an entrenching tool.  I actually tapped one of my teeth with it while eating and it made me feel that accidentally breaking a tooth could be a real possibility with this thing.  But it’s a tank.  The tools on it feel as if you could actually use them to turn nuts and bolts, so if you REALLY are looking for a multi-tool instead of a spoon, this might be the guy to go with.  I would definitely advise anyone interested to get one in your hands and feel it before you buy it.    Otherwise it may just end up being another bit of gear laying the bottom of your pack.  And just as the regular Eat’n tool,  the mini carabiners are not going to last.


The last item on my showdown turned out to be a great buy.  While looking for 1 of the non coated Eat’n Tools for myself, I ran across the Ozark Trail Walmart brand set below.  I decided that since it was even cheaper, I’d give it a try.  I was pleasantly surprised.  much lighter than the XL and about the same weight with both knife and spork as the Eat’n tool.  A slightly longer handle made it easier to use as a regular spoon and get into deeper cups, but still short enough to fit inside most small cup kits.  Really about the perfect length for a pack kit.  I wish they sold the spork without the knife.  Would be an even better value.  🙂

It has a black non-stick coating that seems a bit more durable than the powder-coats on the CRKT’s.   Plenty tough enough to last a lifetime.  The knife is ok, but nothing special, it’s serrated, so the edge it will last without sharpening for quite some time, however since since we all carry good quality sharp knives everywhere anyway, for a pack kit, I’d leave the knife at home and just take the spork.   Of course, the spork has the same issue as all the other sporks, just too short to be a fork, and lets the liquids drain too much.  Quite frankly, if they made this version without the spork cuts, I would consider it near perfect.  And at roughly 1/2 to 2/3rds the cost of the other models.  It’s an amazing value.


A comparison shot to show the difference in thickness of the various metal sporks.

All in all, any one of these tools will work, but given the choice, I like the Ozark trail Spork and the smaller CRKT Eat’n tool the best.  I will continue using all of them over the next couple months for camping and let you all know how they are after being used for a longer period of time.

Happy eating on the trails!

Doc


Update on Firecord

6 months ago, I purchased some Firecord and did a review on it.  It’s a neat and simple way to keep some fire starting material with you.  Sure there are thousands of ways to make fire, but just for simplicity and availability on all your gear, this stuff is great.

I wanted to test the longevity of it under normal use.  I’ve had some tied to my packs for 6 months.  Been rained on, and had dew on it and snow and been through many freeze/thaw cycles.    Does it still work after it’s been hanging around on my kit for 6 moths?  Well, the answer is a resounding Yes!   I will rerun these tests every 6 months and see how long it really lasts.

2016-01-30 13.53.02

Just a little rubbing with the edge of a knife will fuzz it up to catch a spark.  Doesn’t take much fuzzing or sparking.

2016-01-30 13.53.48

One quick spark with a Fero rod and it took right off.

So all in all, I’m still a fan.  it’s so easy to tie some paracord off on your kit.  And just have it on standby “Just in case”.   I’m going to do an immersion test next to see what kind of water-logging it can really take and still light.

Thanks for stopping by and enjoy the trails!

Doc


Sterno Dynamo Mini Camp Stove

I finally broke down and picked up a mini backpacking stove.  I’ve used a Coleman exponent for many, many years.  And it is my absolute favorite, but it does take up some room.  I’ve eyeballed a couple of the mini stoves but just wasn’t sure I’d want to haul the fuel canisters over the white gas.  White gas is so flexible and easy to use, and you can haul quite a bit of fuel in a dedicated fuel bottle the size of your average water bottle.  (Mine is an older Nalgene style that holds about double what the MSR red metal bottles).  So I can cook several meals a day for many many days on that.

2016-02-14 12.29.25

Stored in that little plastic box, fits easily in the Stanley Cup


However the vast majority of my camping trips are single or double overnights, so it’s a bit of overkill.  So I was looking for something small, and efficient for the quick overnight trips that was a bit lighter.  I’ve been looking at the Primus butane stove at Walmart for $19 for a while and almost grabbed it, but was in a Walmart quite a ways from home and it had the folding Sterno Dynamo for the same price.  Of course that made for a tough decision.

2016-02-14 12.30.07

The whole kit and Caboodle (Still need to figure out what a caboodle is LOL)  Including the mixed Primus 4 season mix fuel canister I used for testing

The whole kit and caboodle (Still need to figure out what a caboodle is LOL)

The Sterno folds up a tad smaller than the Primus, so it fits inside my Stanley Adventure set perfectly with the coffee press parts.  (See this review).  The primary difference between the two was the Primus had a maximum 10,000 BTU output while the Sterno has a maximum of 6,500.  If you run the calculations, they end up using fairly close to the same amount of fuel. However, the higher BTU output does not correlate to an equal speed increase while cooking.   (The nature of thermal transfer through solid and liquid mediums varies).   Thus, even though the Primus can boil water 25% faster, it uses 33% more fuel at peak setting.

The Primus can boil 10 oz of water in 3 minutes and the Sterno boils it in 4.  So there is a very slight drop in fuel usage with the Sterno.  This equates to about a 8% gain in fuel economy with the Sterno Dynamo.  Not a big difference by any means.  Considering the typical run time of a standard sized canister is from 1 to 3 hours.  (Expected 1.5 average), that 8% equates to about 7 minutes per canister.  There are so many variables that in essence, the two could be considered equal.  (I plan to record burn times on canisters for the next year to get a real world average).

2016-02-14 12.28.46

All of the kit is inside the Stanley cup.


So I decided to go with the slightly smaller Sterno.  Took it out for a test run today.  Perfect timing as we had a small blizzard blowing through.  Nothing big, just 3 inches of snow and 20 mph winds.  The static air temp was 14 and the windchill was close to zero.  Those who know me, know this is my favorite kind of gear testing weather.  🙂

2016-02-14 12.31.04

The stove is quite small when folded, but much more sturdy than I expected when folded out.  Here you can see the piezoelectric igniter.

So I took a hike up to the camping area in our local park. (Driving was pretty bad so I didn’t want to risk going up the big hills in the van so I hiked from the park entrance).  Here is what I did.  I built a french press out of my Stanley (See the link here).

First thing to notice is the stove unfolds in a rotating manor (That is why it is so sturdy, no “Folding” parts to create weak points.  the entire stove rotates around a central bezel.  Ingenious idea.  The little feet flip out to give it a bit more surface area for holding the pot.

The Piezoelectric igniter works like a charm, doesn’t take much pressure to pinch the switch and presto, flame.  The wire control to turn the valve works perfectly and does not get hot, so you can adjust the flame as needed.    In fact the only complaint I have about the whole thing is the lever doesn’t stay in the folded up position when you go to store it, so it can be a bit of a pain to put back in the box.  Not a big issue at all though.

2016-02-14 12.33.50

I filled the cup with snow and started it melting.  As the snow to water ratio is 10 to 1 on average, I had to add snow a couple times until I had 10 oz of water.  (This did hinder the heat test slightly, as each time I added snow, is cooled the water back off).  I did a boil burn test using water from my canteen separately and used the times from that for the official test.  Melting the snow took about 7 minutes total, so each time i added another scoop of snow it added another minute to the boil time.

2016-02-14 12.37.21

After the first full melt, only 4 oz.  It took 2 more dumps of snow to get 10 oz in the cup.

All in all, it’s an impressive and amazingly small stove that works very well.  It has found it’s way into my day pack with a canister of gas, and I’ll continue to keep the exponent and larger fuel bottle in my primary base-camp pack.   Only time will tell if I end up preferring to carry the mini stove with the bulkier fuel can’s, but for backpacking and short trips, it really does seem like a great way to go.

If you’ve been putting off getting a small camp stove because you’ve looked at the more expensive whisper lights and other high end stoves.  This guy can be had for $19 or less.  (I got it for $14.95 on clearance) it’s a fairly inexpensive way to test the waters.

Enjoy your backpacking and hiking trips and always keep some hot coffee handy with this little guy.

2016-02-14 12.34.15